PiGate RMS
| Welcome | How it works | Build a PiGate | PiGate RMS | Order Completed PiGate |
| Downloads | FAQs | Contact | License | Gallery Videos |
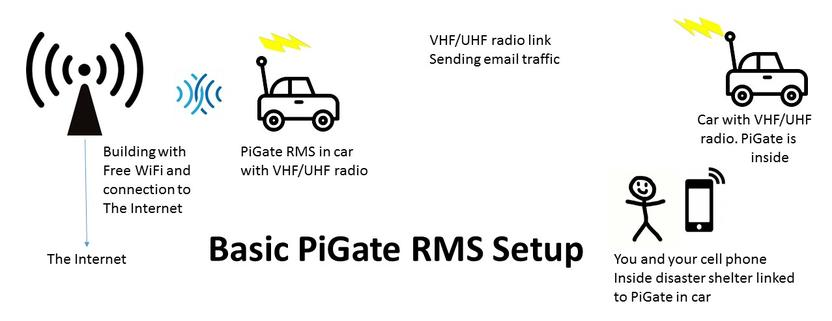
When deploying the PiGate to a disaster location, many times an existing RMS station is not within range. The only way to get an RMS station for the PiGate to connect to in that situation is to bring your own. The PiGate RMS is a completely portable Radio Mail Server (RMS) that connects to the Internet and allows email to be sent to any address in the world. This is done by using the Winlink2000 global radio email system. The PiGate device itself connects to the PiGate RMS station through a VHF or UHF radio link. You can, of course, use the PiGate RMS as a dedicated RMS server, running 24/7. The cooling fan keeps the device at a nice temperature and the low power consumption is great when used at a remote site.
The PiGate RMS device uses the same hardware platform as the PiGate, the Raspberry Pi mini-computer, and a TNC-Pi board, except a display is necessary to connect to a WiFi hotspot for Internet access. The major difference is in the software which uses John Wisemann’s excellent BPQ32 software that has been in use for many years by hams all over the world.

Here are the downloadable docs that fully describe the PiGate RMS device, how to set it up, and how to use it.
The link to download the software image is available on the Downloads page. The latest image works on either the 3.5-inch or 7-inch displays and with the Raspberry Pi 3B+ or Pi4.
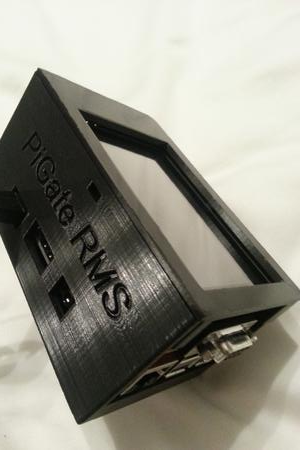
The best implementation, in my humble opinion, is with the Adafruit 3.5-inch display. This is small, completely self-contained, and so simple to setup. Here are a couple of pictures of mine with Brent’s custom case.
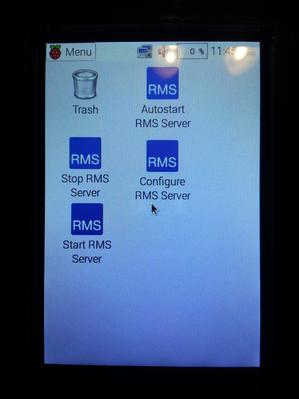
The basic configuration of a PiGate RMS uses an Adafruit 3.5-inch touchscreen designed for the Raspberry Pi. The screen is used to configure the WiFi connection to the Internet and setup the RMS station with your data.
Other PiGate RMS implementations can use a 7-inch touchscreen display, or an external HDMI monitor like the one shown here, or this one. (I am not selling these devices, just linking to them to show what is available)
In all cases, a small USB keyboard (and optionally a mouse) will be necessary to enter information, such as a WiFi password and the RMS configuration.

The fan screen at the end of the case can be used to optionally mount a 30mm 5-volt fan. Adding the fan will require connecting two power leads to the display board, or figuring out a way to power it from the Raspberry Pi GPIO. Completely assembled and testing PiGate RMS servers, with a fan, are available for order on the Order Completed PiGate page of this website.

